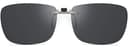
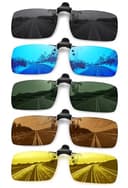
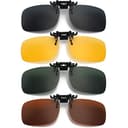
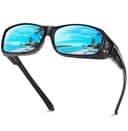
Measure your frame before you buy anything
Two numbers decide whether a clip-on will work, and both take a ruler and a minute.
- Total frame front width. Measure straight across the front of your glasses at the widest point, hinge to hinge, in millimeters. This is the number most clip-on listings size against.
- Single lens width and height.Measure one lens at its widest and at its deepest. A clip needs to cover both dimensions, and the height is the one people forget — a clip that matches the width but is shallower than your lens leaves an unshaded band along the bottom.
You can shortcut part of this: the first two numbers printed inside your temple arm are lens width and bridge width, and lens width plus bridge width plus lens width gives you a close approximation of the frame front. Our size guide explains how to read them.
Then buy a clip whose stated dimensions are equal to or very slightly larger than your lens, never smaller. A clip a millimeter or two oversized looks fine; one that is undersized looks like a mistake and performs like one.
How to choose a clip-on
1. Attachment type decides how it lives with your frame
- Rimless side clips grip the outer edge of each lens. Lightest, least visible, and the most likely to bend out of alignment over time. Good on metal frames.
- Bridge clips hook over the bridge of your glasses. Very quick on and off, and they distribute weight badly — a heavy clip on the bridge pulls your glasses down your nose.
- Magnetic clips attach to magnets built into the frame. The best experience by far, and only available if your glasses were sold with the system. You cannot retrofit it.
- Flip-up mechanisms let you hinge the tinted lens upward without removing it. Genuinely useful for driving through a tunnel or stepping into a shop, and a point of failure over years.
2. Insist on polarization, because you get it cheaply here
Polarization is the feature clip-ons deliver best value on, and every primary pick on this list has it. Since the main use case is driving, and the main complaint drivers have is glare off wet tarmac and the reflection of the dashboard in the windshield, this is the feature that changes the experience. Our polarization guide explains what it removes.
One caution specific to clip-ons: if your prescription lenses already have a polarizing layer, or if you have certain lens treatments, a second polarizing filter in front can produce dark patches at some angles. Rare, but check before you commit.
3. UV is the spec this category is worst at publishing
An uncomfortable pattern worth stating plainly. Clip-on listings frequently claim “UV protection” without a figure, and some state nothing at all. Two of the picks on this page fall into that group, and their cards say so.
There is a partial mitigation that applies only to this category: your prescription lenses are underneath, and modern plastic prescription lenses are commonly supplied with a UV treatment. The AAO addresses this directly in its guidance on whether a UV coating on prescription lenses is enough on its own — the answer being that it helps but does not substitute for proper sunglasses, largely because a clear lens does nothing about the light arriving around the edges of the frame.
So: ask your optician what UV treatment your own lenses carry. That is the honest way to fill this gap, and it is free. Our UV testing guide covers what can and cannot be verified.
4. Accept the reflections, or choose a different route
A clip-on puts two extra glass or plastic surfaces in front of your existing two. Every additional surface produces a reflection, so you will see some internal ghosting, particularly at night or with a light source behind you. That is physics rather than a manufacturing defect, and no clip-on avoids it entirely.
An anti-reflective coating on the back surface of your prescription lenses reduces the worst of it. Our lens coatings guide explains why the back surface is the one that matters. If the ghosting bothers you a lot, that is the signal to move to prescription sunglasses or a photochromic lens.
5. Protect the frame underneath
Metal clips against a coated frame will eventually leave marks, particularly on painted or matte finishes. Two habits help: clip and unclip in the same place each time rather than wriggling it on, and store the clip in its own pouch rather than loose in a case with the glasses, where it will rub against the lenses.
That second point matters more than it sounds. A clip rattling against your prescription lenses in a bag is one of the fastest ways to scratch an expensive lens, and no warranty covers scratches — our repair guide covers what the major brands exclude.
Worth noticing while you are here: the flip-up clips on this page are themselves rimless, which is why they weigh almost nothing and why their lens edges mark so easily. The same build is sold as standalone sunglasses, and the trade-offs are identical — nothing crosses your view, nothing protects the lens. Our best rimless sunglasses roundup ranks the drilled, one-piece and semi-rimless versions against each other.
Clip-on, fit-over, photochromic or a second prescription?
| Option | Best when | Main drawback |
|---|
| Clip-on | Cheapest route; your prescription changes often | Fit is fussy; extra reflections |
| Fit-over | You want side coverage and do not care how it looks | Bulky; obviously an overlay |
| Photochromic | One pair for everything, mostly outdoors | Barely darkens in a car |
| Prescription sunglasses | Best optics and appearance | Most expensive; obsolete when the prescription changes |
Our prescription sunglasses guide covers all four routes in depth, our fit-over roundup covers the overlay option, and our photochromic guide covers the one-lens approach and its limits.
Where to spend and where not to
Spend almost nothing, honestly. This is a category where the expensive options are not meaningfully better than the cheap ones, because the deciding variable is fit and fit is free. Buy a correctly sized $15 polarized clip rather than an incorrectly sized $50 one.
The exception is if your glasses came with a magnetic clip system — then buy the manufacturer’s clip, because nothing else will attach. And if you find yourself fighting the clip every day, stop optimizing it: that is the signal that you want prescription sunglasses, and the money is better spent there. The fit hub has the rest of the fitting guides.
If your frames are large, round, rimless or an unusual shape, a clip may not be the right format at all — clip-on versus fit-over compares the two side by side.